Category: Parent

Watermelon Cupcakes Are a Great Summer Birthday Surprise!

Help me welcome Pamela from Creating Barefoot! Pamela is a busy mom, Barefoot Books Rep, Blogger, Painter and an all around super mom! She is sharing with us how to make watermelon cupcakes. Curious? Read on! Oh and there’s a giveaway too! Read through to the end for details!
Pamela from Creating Barefoot

I am beyond thrilled to be a guest blogger for The Whatever Mom! I have followed her blog since day one; and I have loved and related to each and every post. Before kids I was a complete planner, over-achiever and detailed person. Now that I have 2 very different boys constantly running in different directions, with different wants, and likes and tastes I have certainly come to take on the “whatever” mantra myself.

My older son, completely unlike his mother, will not put a piece of chocolate to his mouth. No ice cream, no cake, no frosting, no candy bars. But put a bowl of fruit in front of him and he will devour it and ask for more. Of course not something I mind, though hard to lure him with bribes of sweet treats when I need to give him a little extra incentive.

Like any new, over- achiever mom I slaved over his first birthday cake. A beautiful sesame street chocolate cake covered in yummy butter cream and sweet fondant Elmo faces. He wouldn’t touch it, let alone try a piece. I thought great, I won’t have to worry about the sugar high later.

By his second birthday I felt bad he wouldn’t eat his own birthday cake. I knew I had to come up with something different and carved his cake out of a watermelon instead. He ate a great big juicy slice and loved every last bite of it.
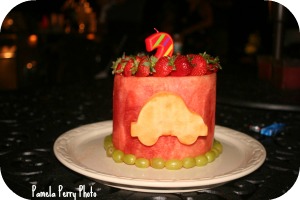
Watermelon carved cake

The first “cake” went over so well, the following year I made this for his Mickey Mouse Train Party. (We had a joint party so the cake on the bottom was for his cake- loving little brother).

Watermelon Mickey Train

And that brings us to this year and my dilemma with sending in a healthy, child friendly snack for his birthday celebration at school. I wanted to make sure it was something he would eat and per the school guidelines it had to be healthy. Following my watermelon cake tradition I figured I could pretty easily make them into cupcakes!

Watermelon cupcakes with banana frosting and blueberry topper

Here is what you need:

  • 1 Watermelon sliced into 1 inch slices
  • 3-4 Bananas
  • A Circle shaped cookie cutter (be sure it is small enough to fit inside your cupcake liners)
  • Blueberries for topping
  • Decorative sprinkles

STEP 1: Cut watermelon into 1 inch slices.

STEP 2: Use cookie cutter to cut out each circle and place inside cupcake liners.

STEP 3:  Cut two small slices of banana per watermelon slice. Mash them up a little to look more like frosting and place on top.

STEP 4: Top with blueberry as the “cherry topper” and add a generous amount of sprinkles.

melon cakes edit

The teachers raved about the “cupcakes” and the kids ate them all up! It is a super healthy and adorable summer birthday treat!

And now for the Giveaway! ONE lucky reader will win a FREE book from Barefoot Books!

This giveaway is only open for 24 HOURS! Click the link below and follow directions in the box! Don’t forget to share!

Enter to win THIS book!

http://www.rafflecopter.com/rafl/display/e032391/

*This giveaway is now CLOSED*
Family Savings Jars – Dimes for Disney

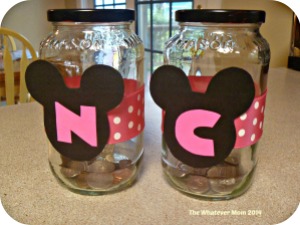
Most of my crafty ideas start with me rummaging through the house to find whatever items I already have on hand.  I found these awesome mason jars (which held our store bought pasta sauce) and knew I needed to use them for something! Disney jars it is! I think my girls are still a little too young to appreciate the magic of Disney World. I really want them to experience it while they are young enough to believe in magic, but old enough to remember taking it all in. So the goal is to save up our dimes and celebrate their 5th birthday in Disney!

Here’s how I made the jars:

I chose glass jars so we can watch the money add up each week! They’re also small enough to carry to the bank when we are ready to deposit. (No thanks water cooler jug). Removing the labels is easy; just soak for 10 min. in hot soapy water.

Materials I found
Materials I rummaged

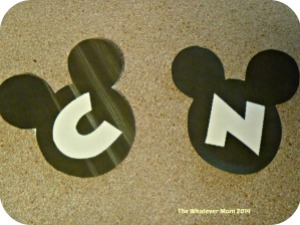
I found this great site that allows me to print Mickey ears with my kids’ initials in the Disney font. I cut and paste into a Word document and re-sized them to what I need.

Print on card stock, cut and apply

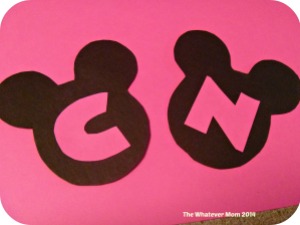
It would have been awesome if I had thought to print on card stock (and checked my ink levels). Since I did not, I used them as templates to make these:

If you did not print on card stock use printed ears as template on actual card stock
If you did not print on card stock use printed ears as template for actual card stock

I found some pink polka dot ribbon to match the pink letters. I simply taped one edge to the glass and wrapped the ribbon tightly around the jar and used a glue gun to secure it. (Glue guns scare the heck out of me so I only use very sparingly).

Fold one end of ribbon over to create a clean fold before securing to other end of ribbon

I painted the lids to the jars last. I didn’t have any spray paint on hand, but I did have a pint of latex paint from a project I never completed. So, I just brushed some of that on. In hindsight spray paint might have been quicker, and I totally regret not using glitter.

Use spray paint for quicker application and clean up
Presto change-o!
Presto change-o!

Now how will we fill these wonderful Disney jars? With the blood, sweat and tears of toddlers of course! How else do toddlers earn a little extra pocket money? Yep! Chores! I am putting my 3 1/2 year-olds to work and using a Disney chore chart! I feel your concern regarding child labor laws, but let me assure you we keep the toddler chores pretty simple around here. The girls chore list includes picking up their own shoes, toys and dishes; which they do already. Only now we reward them with stickers and pennies. This is a great way to introduce the concept of rewards and consequences. Mwahahaha!

Finished jars
Finished jars

Maybe you’re not saving for Disney, but it might be fun to start a family fun jar to pay for a pizza night, movie tickets, or entrance to a water park. Whatever your goal is get the kids excited. Help them decorate a jar and decide on ways they can earn money to deposit. Drop in coins when you can, or let them deposit their allowance. It’s whatever you make of it!


Introducing Phase 2

We interrupt this regularly scheduled crafty blog to focus a moment on Phase 2 of my frumpy to fabulous plan. Remember my post about how to spring clean your look? Well that was Phase 1 of my plan. I decided to add Phase 2, Healthy Eating and Exercise, after my daughter caught me getting out of the shower. Her exact words were, “Mama, you’re floppy!” (She used to be my favorite).

Before kids, getting out of the house was so much easier. I could be out the door in 15 minutes or less. Now it takes an hour. The breakdown of that hour looks like this: 20 minutes discussing pants (actual topic); 10 minutes spinning in circles before putting on socks; 10 minutes answering questions about socks; 5 minutes wrestling shoes onto toddlers; 10 minutes countering complaints about having to leave the house; 3 minutes 30 seconds just to cross over the threshold to the outside world; and 1 minute 30 seconds to count every single flower on the way to the car.

All that spinning and wrestling might sound like a work out, but it sadly isn’t helping any with the aforementioned floppiness. As a mom with twins glued to my hip I don’t get much time to myself. I don’t have babysitters or money for the gym

But, with recent news of my floppiness, I went in search of what could possibly work for a mom in my situation. I found an at-home solution through Great Expectings.  Christine McCracken, owner of Great Expectings, is also a nurse, a mom and fitness enthusiast. She has made it her goal to help women (and moms like me) with limited time and access to a gym get fit. (Is that a choir of angels I hear?)

We spoke over the phone for an initial consultation. I shared all my injuries and postpartum issues and she went right to work creating work outs I can do at home. Each week she emails me a daily workout schedule to complete. Each day I log my food and exercise choices at myfitnesspal (she can see what I eat- ack!). I have access to her every day via email, text or phone. It feels like having an exercise buddy cheering me on and it motivates me to stay accountable.

On the healthy eating front I have my groceries delivered each week. This saves me from the candy aisle and impulse buying (yes, I meant to buy a Kit-Kat, 2 bouncy balls and a new hammock). I try to incorporate Christine’s tips for healthy eating into my meal plan. Like drinking water and including extra veggies at each meal. Outsourcing my workout planning and having my food delivered, I’m feeling pretty fabulous already!

Readers, I think you know by now The Whatever Mom Credo is to simplify and to do “whatever it takes to get through the day.” Well, that includes fitting in exercise and time to take care of our health. This is one area it is not safe to say, “Whatever.” You don’t have to join a gym, or do what I do. Just find what works for you!


Make a Summer Bucket List!

Dare I say the winter that would never die has finally passed and we can FINALLY, FINALLY (no for real this time) enjoy some summer time activities? Woo hoo!

For us, summer begins a flurry of travel plans, exciting adventures and new places to see.  I feel like our social calendar fills up so quickly it’s easy to lose track of the simple things summertime offers. My girls are 3 ½ this summer which means they can enjoy a greater variety of activities this year. This age is when those warm memories start to really take hold. I want to share the lazy parts of summer with my kids as well as the excitement of big adventures.

This year we are making a Summer Bucket List!


Get as fancy as you want when making your list

Making a summer bucket list is a fun way to add new adventures, make memories and keep traditions alive. We made our list by first checking out local sites we keep meaning to try. We added a few new hiking places, some old hiking places and parks/museums that offer free admission days.  I layered in a few summer staples I want to be a memorable part of my girls’ childhood- like making s’mores, snuggling by a camp fire, eating ice cream for dinner and watching fireworks. I didn’t forget about those rainy days that catch us by surprise. I sprinkled in a few rainy day activities to keep us busy and to make some memories with; like dancing in the rain, a puppet show, making a fort and a Disney movie marathon.  I am excited to wake up each day and choose our own adventure!


Display list in a frame and use dry erase marker to check off items

Here are some tips for making your own Summer Bucket List:

Keep it simple. If you put too many big adventures on your list that require a lot of planning, travel time and money it may feel more depleting than memorable.

Check your local resources. Are there free hiking trails, picnic areas, beach areas you can use? Many libraries have free museum passes to loan, and they offer free programs throughout the summer.

Set an intention for the season. Are you looking for more family time? Are you looking to slow down and enjoy the simple life? Do you want to start a family project, or get more involved in your community? Maybe take a “staycation” and explore what your local area has to offer.

Consider what stage your kids are in.  For the under 2 crowd maybe a simple list of things to accomplish with them. Like learn to blow a bubble, see grandma for the first time, or try a new park. If your little one is more mobile and ready for some action you can try group activities like a new story hour, make a new friend at play group, or try swimming in a pool.  Don’t forget about all the free sample classes at your local Little Gym/Gymboree, Music Together and other “mommy and me” type classes.

The fun part is getting the whole family involved! This way everyone has something to look forward to. Display your bucket list where everyone can see it and take turns checking off completed items.


Display your list or make an interactive list by using cards you pull out of a bucket


The completed list becomes a great keepsake for any scrap book. Hey make that one of your bucket list items- scrap booking your summer! Enjoy!

Get your FREE printable bucket list 2014 Summer Bucket List 2!


Kid’s Art Storage

During my last visit home my mother handed me this haphazardly filled box of some of my old artwork and collectibles. Not everything fit and it was spilling over the sides of the box. I dropped most of its contents on the way to the car. I was excited to see mementos of my childhood but overwhelmed by sorting through it.

My sad little box.
My sad little box.

This made me think about how to store my kid’s little creations. Now that they are in pre-school they bring home new art projects each week (times 2). I went in search of ways to organize and store their creations. I wanted something to last through their school years.

Some time ago I found a nifty and thrifty way to display our weekly creations. I fashioned a very simple and inexpensive hanging gallery using twine, 3M Command hooks and clothes pins. All stuff I already had on hand. This hangs close to our entry way so the girls can clip their art as soon as they walk in the door.

Our gallery line
Our gallery line

Simply apply the Command hooks according to directions and tie the ends of a piece of twine to each. Clip artwork to the line with a clothes pin. You can get as fancy as you’d like by using colored ribbon and colored clothes pins, or just keep it simple and use what you already have.

3M Command Hook

3M CommandHook

Artwork stays in the gallery for about a week (when the next round of art work starts coming in) before I sort through which pieces to keep and which pieces to toss. I am a ruthless chucker. I only keep the pieces that are really special. I’m a sucker for hand prints, projects made for mom and dad and anything that looks like more than practice scribbles. We haven’t had any over sized pieces yet, but I am already planning to toss those (unless my children are prodigies in that case I’ll keep them).

For storage, I purchased two plastic file bins at Walmart for less than $20.00. I re-purposed some file folders I already have and downloaded some free printables I found online. I like the simplicity of someone else doing the work and then downloading to print.

File storage bins
File storage bins

I don’t have enough storage for each child to have their own file bin, so I am doubling up. One bin is marked for preschool through sixth grade. The second bin is marked for seventh grade to twelfth grade. I will drop keepsakes for each child into one file folder and let them sort it out (10-20 years) later. Each folder is pre-labeled with the school year and inside each folder is a cover sheet to include school picture and school info. Since everything is labeled I can just drop kids’ keepsakes into appropriate school year and be done.

Pretty little tabs all in a row

I save myself years of organizing time, and I save my kids the hassle of dragging toppling boxes to the car one day. The whole project took me less than 30 minutes. The most time consuming part is cutting out the labels and putting in the tabs. A project you can do easily in front of the TV.

How do you save your kids artwork? Are you a ruthless purger, or a keepsake queen?

Mother’s Day Giveaway Extravaganza!

I am beyond excited to share with you The Whatever Mom’s VERY FIRST Giveaway! In honor of Mother’s Day there will be FOUR lucky winners of some really amazing prizes!

To enter simply sign up to follow my blog and like and share my Facebook posts about the contest! Winners announced on Tuesday May 6th!  That’s only 5 days away- better get to sharing!

Here’s what you could win:

arrival giveaway 2Arrival giveaway

A children’s book and coloring book set! The Toddler Room “Arrival” written by Hudson Valley author Jodi Lobdell Bulson, tells the story of a little boy’s journey to day care. This set is prefect not only for teachers and daycare providers, but also for parents of young children and for children starting a day care routine for the first time. Jodi holds an associate’s degree in early elementary education and now owns and operates a day care in her home.

bucci giveaway

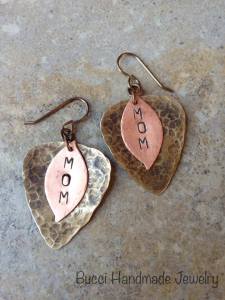
A specially designed pair of  earrings from Bucci Handmade Jewelry! These brass and copper earrings are nickle and lead free. Karen Bucci began making hand crafted jewelry from her home in Saugerties, NY in 2008. She is passionate about creating unique pieces that allow women to express themselves and is very selective about the materials used in her original designs.

HVSC giveaway

A gift basket of extremely natural Hudson Valley Skin Care products!  Glenn and Cathie Arpino, owners of Hudson Valley Skin Care, hand make fresh, small batches of product right here in the Hudson Valley. They include local ingredients into their products as often as possible. This is perfect for yourself, or any mom in need of pampering! (Products in photo do no to represent products in gift basket).

And, the grand prize is:

Union-Health-Wellness-150-2 giveawaygreat_expectings giveaway

A FREE consultation and ONE MONTH of Health coaching with Holly Walsh! Holly is a certified Health and Wellness coach and owner of Union Health and Wellness LLC.  She is committed to helping people find a balanced nutritional path! Plus a FREE consultation and ONE MONTH fitness follow up with Christine McCracken owner of Great Expectings.  Christine specializes in helping moms get fit with or without a gym membership, and getting in shape before, during and after pregnancy. Who couldn’t use a total health makeover?

(Both Holly and Christine offer their services via telephone for convenience).

CONTEST RULES:

Must be 18 or older to win.

Do not need to be a mom to enter- all prizes are great gifts for anyone’s mom!

Must register as a follower of The Whatever Mom, or Like and Share The Whatever Mom’s Facebook posts about this contest.

Winner will be selected at random by midnight on Monday May 5th and announced on Tuesday May 6th.

One winner per prize item.

Happy sharing and good luck! 

*This giveaway is now CLOSED*

Spring Clean Your Look

Anyone else hear about this new fad called “spring cleaning?” It’s where you clean stuff simply because the season has changed?  It’s all the rage in my house right now. We are pulling apart closets and cleaning in corners we didn’t even know we had. It all started because I was tired of my ugly wardrobe. I don’t know about you but I am kind of over selecting outfits based on their ability to camouflage snot stains and glitter.

Before kids if something didn’t fit I would just go buy something new. I didn’t worry about labels like, “machine washable,” or “dry clean only.”  I had plenty of stylish clothing to wear to work, out with friends and while lounging at home. Now, I can barely tell those outfits apart. So, I decided to spring clean my wardrobe.

I started by thinning out the clothes I could no longer wear based on size, location of stains and tatters. This left me with a sparse amount to work with, but I’m a creative mom! I can make toddlers believe terrible things will happen if they don’t eat their peas!

Next, I coordinated a few outfits to have at the ready for moments beyond the standard issue mom uniform (t-shirt, jeans and sneakers).  I waste so much time over thinking and rethinking an outfit before leaving the house. Having outfits I can just grab and go saves me from all that!


My sparse, but clean ensembles

I layered accessories right on the hanger so I have a complete outfit.

Hang coordinated belts, scarves and necklaces with outfit

When I finished, I realized my makeup bag could use a little rehab. I have some “vintage” pieces in there it was time to let go of.  I don’t have a lot of time for make-up, but there are days I want a casual look. My new dash out the door (can’t tell I didn’t sleep a wink) look consists of a tinted moisturizer with an SPF, cream eye shadow I smear on with my finger, mascara and lip balm. Kiss My Face Lip TreatMint is  the only lip balm I wear ever ! Feels great and the SPF covers me for play dates at the park!

Streamlined make up routine

After I cleaned everything up I realized my nails looked shabby too. It seems the mani/pedi is the first thing to get the boot when moms go on a budget. A friend of mine shared her secret for a one minute manicure- press on nails. I know sounds really tacky (no pun intended). But, not only did my husband think I spent big bucks on a manicure, I also got a lot of compliments from friends and strangers. These are great for date night, mom’s night, grocery shopping, or whatever. I don’t have to find time to get out to the salon. No dry time! No smudging!

Instant manicure- no baby sitter required!

Three and a half years into the mom gig and I realize how easy it is to get sucked into a wardrobe rut. It’s sad how little I’ve invested in my appearance due to time and feeling overwhelmed. Now I have a simple, clean wardrobe to select from and I gain a few extra minutes in my day with a simplified routine.

What does your mom routine look like? What are some tips for keeping your wardrobe current?


A Funny Bunny Photo Booth

Our sunny funny photo booth

I wanted to do something really fun for the girls Easter pics this year. Short on time and money for a professional photographer, I decided to create my own funny bunny photo booth. But once I made the booth it was too cute to keep to ourselves. So, we invited a few friends for an impromptu bunny bash. Luckily, my very awesome (and talented) friend Danielle brought her fancy camera along to get some great pics of our little party goers.  A total bonus!

Our photographer Danielle and her daughter Sydney

I selected a fun background to give our photo booth a casual feel. I used a chevron designed wrapping paper taped to an extra piece of paneling we had lying around. You could tape it to your wall, but hanging the paper on the wall is a two person job and I am a one mom operation. Using the panel was easier and allowed me to hide the back drop so I could surprise the girls in the a.m.

Use painters tape to keep wrapping paper in place

I strung a line of foam shaped chicks across the patterned paper. I simply taped some twine to the back of each chick. You could easily skip the paper and just hang a string of fun themed shapes to a clean colorful wall inside your home. Or, move outside and hang the shapes along a fence, around a tree, or on the side of your house.

Tape foam shapes to a piece of twine for an easy garland

This time of year you can find bunny ears at every dollar store- a must have for a funny bunny photo booth!

Bunny ears from Target

To make a bunny face I used a wooden mustache prop I found at Michael’s.  I added a fuzzy pom-pom nose and some colorful pipe cleaner whiskers for a touch of whimsy. I tried to use Elmer’s glue, but the hot glue gun worked the best.  Of course I had to add in some recognizable bunny teeth. I used white craft foam with adhesive backing and attached directly to the mustache.

Easy to make props
Easy to make props

I situated our photo booth in the sunniest spot of our house. Natural lighting makes for the best photos! Then, we handed the kids the props and let them have fun! I wasn’t worried about them posing angelically; I was just shooting for nobody crying. My goal was to make some fun memories with our friends. Mission accomplished! How cute are these kids?

Friends posing as bunnies
Bunny buddy
Bunny buddy
Little bunny
Little bunny

For less than $10 I now have some fun pics to commemorate our Easter holiday. I can print as many photos as I’d like and email copies to distant relatives (thank you Danielle!).

A themed photo booth is a great alternative for kids who are afraid of the Easter bunny, or maybe too little to meet the EB yet. It’s also an easy, affordable, fun activity to do for birthday parties, play dates, or holidays. Just change up your props!


Have you taken your own kid pics at home? What do you do to make it fun?

Gratitude

Cheers to my readers!

Just a quick post to say thank you to everyone for supporting my blogging efforts! I truly appreciate that you take the time to comment, like and share my posts. It was your support that gave me the courage to start this blog in the first place. THANK YOU!

I am also very thankful my blog was picked up early by a local magazine, Hudson Valley Parent. If you are already following The Whatever Mom blog  you should receive an email every time I post a new entry. If you are not already following me here, please do!!

Get additional pics and updates on The Whatever Mom Facebook page! I will share my Hudson Valley Parent posts on all my Facebook pages!

If this is your first visit to my page- thank you for stopping by! You are welcome to join the party and get weekly updates. Simply click the small gray follow button in the low right hand corner and follow the instructions. To find out more about The Whatever Mom check the about me section.

Please feel free to comment below, or contact me via Facebook with craft ideas and questions!

Thank you all again from the bottom of my heart! Cheers!

Eggless Easter Fun!

2014 Easter Blog 002

Last year I discovered the simple beauty of plastic Easter eggs and fuzzy pom-poms. With Easter right around the corner I’m bringing these back! It usually buys me at least 30 uninterrupted minutes. I can almost hear my own thoughts while finishing the dishes!

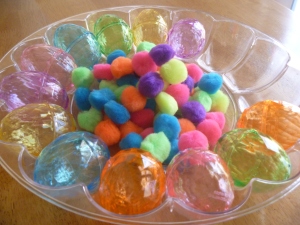
First, I picked up some plastic eggs and pom-poms at the dollar store.

Pick up items at any dollar store.

Next, I dumped them into a deviled egg tray for easy access and storage. That’s it! Done! The kids will take care of the rest! (If you don’t have pom-poms you can use cotton balls).

Eggs and pom-poms
Eggs and pom-poms

You can find an egg tray similar to this one at the dollar store. I just happened to have one on hand.  You can also recycle an egg carton to store the eggs in. Use whatever works for you.

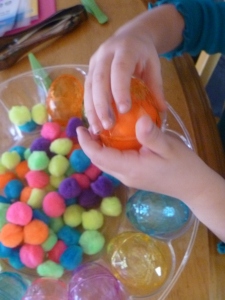
The first things my girls do is sort and match the colors by placing the pom-poms into the matching colored egg.

Color sorting/matching

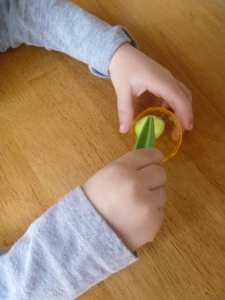
Next they enjoy using kid sized plastic tweezers to count out the pom-poms and fill the eggs. (This is a great activity for developing fine motor skills).

2014 Easter Blog 003

Then they just like to make up their own games through pretend play. They grab handfuls of pom-poms and pile them up and mix them up. Sometimes they pretend to go shopping for eggs and fill up an empty shopping bag.

2014 Easter Blog 011

No matter which scenario they choose, we almost always end with – you guessed it- an Easter egg hunt. They like to take turns hiding the eggs and finding them.  Of course I have to help look for the eggs too.

Last year when I first introduced this to my girls they were 28 months old. I was worried they’d eat the pom-poms, so I sat nearby while they played with them. They also enjoyed taking them into the bath tub, dumping the pom-poms into a bowl to mix with a spoon, and just comparing the fuzzy feeling of the pom-poms with the smooth feeling of the eggs.

This year they found a new way to play- Pom-pom soccer!

Use a straw to blow pom-poms across the finish line.

The first one to blow a pom-pom into an egg using a straw wins. I love that there are so many different ways to play with these simple things many of us already have around the house.

Got a favorite simple (mess free) activity you’d like to share?


Thank you to everyone for following my blog! You can also find me at at http://hudsonvalleyparentblog.wordpress.com/


error

Building a community one click at a time.