Category: Uncategorized

Grief In Her Own Words

As October begins to wind down with everyone’s focus on Halloween festivities, my mind drifts toward the child that won’t be celebrating with us this year. I miscarried our first child on October 27, 2007. Coincidentally October is also Infant Loss and Miscarriage Awareness Month. One in four women will miscarry a baby. It is often difficult to talk about or share our experiences, but I have found 3 brave friends willing to do that here in their own words.

I often wonder how my life might look today with a 7-year old and a set of 4-year-old twins. Would I be different? Would my family be different? After I returned home and to work I didn’t find it hard to share my story with friends and family right away. I think it was more uncomfortable for other people because they didn’t always know what to say. Sometimes words just don’t seem adequate enough to express how we feel for someone else’s loss. After a while I didn’t want to talk about it because I didn’t want others to think I was seeking sympathy. But, I would share if another mom shared with me. Although after 7 years the emotions surrounding my miscarriage are far lighter than when I first experienced the loss, there is still an emptiness in my family circle.

When sharing my story, other moms have expressed difficulty in opening up about their loss, or have felt the subject “taboo.” Some are afraid of being judged, or dismissed. I am grateful for the women sharing their stories today.

Erin’s Story In Her Own Words:

On November 29th 2013, at 14 weeks pregnant, I gave birth to a sleeping little boy named River Eleusis. I have learned so much about life, death, myself, and those around me because of this journey. 

First, I learned that loss looks and feels different for everyone. And that’s ok. We are all different and we experience life differently. So of course we will experience hardship and loss differently. Some people cry for days, months, years. Some don’t cry at all. Some feel lost and confused. Some feel peace and comfort.

My journey through River’s birth was very different from what most people would expect for a mother who has just lost her child. I was filled with so much peace, comfort, and thankfulness for what I was given. There were moments in which I felt that I should be crying for days and days, because that’s what you’re supposed to do. But what I’ve learned is that I need to be true to what I am feeling and what I am experiencing. So if I was happy, I felt happy and completely embraced that emotion. If I was sad, I felt sad. If I was lost, I felt lost. I allowed each thought and emotion to run it’s course, in it’s own time. And I will continue to do so. 

Second, loss is a process and journey. It has been almost a year since River was born and I think of him daily. There are days that he brings me so much joy. There are nights that he fills my dreams while I sleep. There are days that I miss him and just want to hold him one more time. As my journey continues, different emotions come up. I’ve shared with others before that I didn’t just lose River. I lost my pregnancy. I lost feeling him kick. I lost giving birth to him. I lost feeding him. I lost having three children. There have been many losses through this process,and they will continue. I have learned to take each one as it comes and to fully feel the emotions that come with it.

The last lesson I want to share with you is that community is so important. My family and I were surrounded by people who truly care for us. We had a couple weeks of dinners prepared for us. We had people who watched our older children so we could freely feel and think. We had tons of messages filled with love, support, and hope; and we had people who we could share River with openly. The hardship about having such an amazing community was that there were quite a few close friends and family members that also had to move through the grieving process of losing River. It was hard for me to see their hurt and pain, but I knew that they were on a journey just like mine. They too needed to embrace the feelings and thoughts that came. I have learned so much from the people in my life and I am forever thankful for them.

Kelly’s story In Her Own Words:

I was pregnant with identical twin girls called Mono Mono or MoMo for short.  The odds were against us from the very beginning, but my girls defied the odds and we made it to the point of viability where medical intervention was possible.  I spent a month in the hospital on rest and monitoring.  Tragically despite our best efforts my girls passed away 2 days before their scheduled delivery.  My rare story took on quite a following with friends and family and my community and I started a blog to keep everyone up to date.  I continue it today to honor my girls and to share my healing process with others in the hopes it can help someone.   We were lucky that our story was so captivating for people.  We had a large community of people who followed our journey. I think since so many people knew all that we had been through made it easier for people to be there for us.

I also miscarried a child in the beginning of that same year at 11 weeks.  It was harder to find support then.  We had only announced the pregnancy a week or two before.  I really had no idea a miscarriage was possible for someone who had a healthy normal pregnancy with no issues before.  I felt foolish for announcing the pregnancy “too early.”  I was devastated and felt foolish for being devastated about a baby I never felt kick.  I felt like there was a much stronger sense of urgency to “move on” and “get over it.”  I don’t feel like either of our losses were taboo to talk about but I do feel like talking about miscarriage is at the top of the list of things people just don’t want to hear about.

My best advice for those who want to help: don’t offer advice or cliches to help fix us.  Saying things like, “everything happens for a reason,”  “you can always try again,”  and “thankfully it was early,” are more hurtful than helpful.  Stick to things that you truly mean:  “I’m sorry,”  “I love you,”  and “I am here for you to talk to, cry with, or whatever you need.” Offer specific ways to help.  Generic offers like, “Can I do anything for you?”  “Do you need anything?” can seem routine and not genuine.  So be more specific, “I’d like to come by this week to check on you.  Would you like me to bring you macaroni and cheese or that soup I made last time you came over?”  “I’m running some errands tomorrow.  Do you need anything from these stores I’m going to?”  When I was grieving it was incredibly hard to think about the normal day-to-day tasks, let alone be able to express to my friends what I needed help with.

My best advice to those who are grieving:  There is no end to grief.  It is a continuous and lifelong process.  There will forever be things that stir up emotions you thought you had long ago dealt with.  You will forever be healing and growing on this journey.  Don’t ever feel like there is this end platform you will stand on and say I’m 100% over it.  I’m done.  I’ve moved on.  I’m fine now.  Also, don’t feel guilty for having bad days.  Bad days just mean you loved your baby and the life you had imagined for them. It is OK to miss your child and it is normal.  Grieving is a journey and different for everyone.  So be kind to yourself and know that grief is an act out of love.

You can read more about Kelly’s journey through loss on her blog: www.momomommyme.blogspot.com

Anonymous In Her Own Words:

Having been told that I would not conceive without medical intervention, I never expected to return to the United States after a whirlwind tour of Europe and find myself carrying a 10-week-old baby.  I also never expected to be informed at the same time that I was in the process of miscarrying her twin.

I was under the care of a fertility team.  I tracked my cycle with scientific precision.  I bought and used pregnancy tests by the dozen.  I had been bleeding and spotting for weeks, phenomena I attributed to high-altitude air travel and a hectic schedule.  Scientifically, medically, and according to all other ‘ally’ words, this should not have happened to me.  Yet it did. For the first time in my life, I was unsure of myself – uncertain as to how I should feel and act in this situation. On the one hand, I was going to be a mom and receive the most beautiful gift of my life.  On the other hand, I was mourning a baby who would never know what life would be like.

Initially, all I felt was guilt and shame because I immediately thought that I could have and should have done something to protect both of my babies.  The fact that I did not know I was pregnant did nothing to minimize the feeling of loss I experienced.  Even though one of my babies never made it through pregnancy, he or she left a permanent mark on our family; his or her death was not the last word.

The next day, my husband and I went in for what would be the first of my weekly ultrasounds.  I heard it before I saw my sweet little gummy bear up on the screen.  A heartbeat!  A strong, glorious, melodious heartbeat.  And do you know what else?  I saw life.  Life is amazing, sad, and powerful all at the same time; it is a journey that sometimes ends far too soon, and in unpredictable and seemingly unfair ways.  I have come to view my loss as something that is woven into the fabric of our family, as it has shaped how I engage the world.

I once shared my story with a “friend,” who responded with disbelief because I failed to tell her about the miscarriage sooner.  After all, she suffered a loss, which was a seemingly positive home pregnancy test very early on that was not confirmed with further home or blood testing, and shared this with me as it was happening.  This “sanctimommy” (read the blog – it’s hysterical) taught me a very valuable lesson, and one that I want to share with you.  Your grieving process is yours and yours alone; only you can define whether sharing this aspect of your life helps you heal.  If reaching out to others and speaking about your loss doesn’t provide you with what you might need to begin living again, there is no rule saying you have to talk about it with others.  My husband and I are very comfortable in our decision to keep this information to ourselves.  And do you know what?  That’s ok.

Just remember that the day will come when you will all meet again for the first time.


Loss is such a personal journey, but not an experience you need to do alone. There is no formula to grieving. Whether you choose to share it with the world, or just your partner there is no right or wrong way to embark on that journey. With 1 in 4 women experiencing a loss, there are many of us who understand.

Have you survived the loss of a child or miscarriage? What was something that helped you in the healing process?


Things I Won’t Do For My Kids

Welcome to Week 3 of the No Frills version of The Whatever Mom! Hope you are enjoying my personal insights into this parenting gig!

Eating Utensils


We had the luxury of going to dinner at two different restaurants this weekend. We are lucky if we eat as a family at a restaurant two times in the same year. This was pretty exciting for all of us. I am not ashamed of the dance of joy I did when my food arrived… food I didn’t have to plan for, shop for or cook! I was even more delighted that I didn’t have to wash the dishes after our meal either. And, this happened TWO DAYS IN A ROW!! If you’re a mom you know the joy of which I speak.

You may be shocked to learn that dining with little ones is not always a relaxing experience. I have to say I am pretty proud of the way my kids behaved and we didn’t even have to bribe them! We reviewed the rules with them before entering and again once we were seated.  Hubby and I were so excited to be out among the living! (I even wore make up and left the frumpy pants at home! I was that excited!). My excitement, however, was dampened when we were seated near a woman who was clearly annoyed by my child’s enthusiasm for being out in a restaurant.

My girl wasn’t doing anything out of the ordinary for a 4-year old (I was actually feeling really grateful for that!). But, nonetheless this woman is shooting me looks and glaring at me as if to send the message “do something about your kid.” At first I felt like I needed to rush in and appease this woman’s expectations for my child to be seen and not heard. I felt like I needed to apologize for her discomfort sitting near a small child. Then I realized it isn’t fair to punish my child when she really wasn’t doing anything rude, or breaking any rules.

I shared last week my kids can have terrible tantrums in public, but they can also be really good in public! No, really! I felt like we were having a good night and my kids were being charming. So, why all the scrutiny from this onlooker? Is there truly NO place for parents to go without being watched and quietly critiqued? My emotions took several twists and turns as we ate our meal and I felt the burning gaze from this woman. Here are the cliff notes of my inner monologue:

I will not apologize for who my children are. Both of my girls are talkative little story tellers full of excitement and energy. I will not expect them to stop talking because it is bothering someone else to hear them. Although most mornings I’m wishing for a pause button on their conversations while I finish my coffee. Only because they wake up like this and its hard to fain interest so early in the day. I could have shushed my child for talking too much, but it wasn’t bothering anyone else except this one person. I was raised in an environment where children were to be seen and not heard. It didn’t stop me from talking. In fact, I think that’s why I talk to every single person I meet because I was rarely allowed to share my thoughts. (And now I have all of you!). I ran through the check list of things in my head: my girls wasn’t shrieking, jumping, yelling, kicking, running or throwing things. She was just being bubbly, chatty and a little wiggly (in all fairness so was I). That’s who she is as a person. I will not ask my daughter to squelch that so someone else can feel better for the 1 hour of their life they have to sit near her.

I will not feel guilty for having spirited children. It is amazing how other people’s glares or judging stares can make us immediately feel guilty. It can make us feel like we have already failed as a parent just walking in the door. I am not entirely sure where this pressure comes from, but I often find it stopping me in my tracks. I want my children to be perceived as the beautiful little people they are. Trust me, they are NOT without faults (hence the reason this blog is not titled, Damn Right My Twins Are Better Than Yours!). My children love to be fully engaged in what’s happening around them. They will soak in all the details and discuss them and ask a ton of questions about them. They notice details like the ceiling fans are not moving and want to know why. They’ll notice every last do not smoke sign, point them out and then count them.  They notice there are two forks on the table and ask why and then rearrange them in an order they like best. It’s just who they are. Again, no one’s throwing knives or running across tables here. It can be completely exhausting to get through a meal with this intensive Q&A (I almost always finish my wine before my meal). But, my child wasn’t asking this person 1,000 questions. So what am I really feeling guilty about here?

I will not explain my children to other people so that they are more comfortable. During this trip we also met up with family. We had to skip out right after our meal to get on the road and  make the 3 hour drive back home. Oh how I wish we could have stayed longer and really soaked up the extra time with everyone. But, I could see how hard my kids worked to get through the last 2 hours in a restaurant, after they worked hard to get through the 1.5 hours at church after not getting nearly enough sleep the night before. I knew in my mother’s heart I could not push them a minute longer let alone another 2 hours of socializing. I spoke with my husband who agreed we should take this opportunity to exit. Not everyone understood why we were leaving. I really wanted to explain that I was saving them (and myself) the torture of a one hour shrieking meltdown once my kids had reached their max. I wanted to explain how Sensory Processing Disorder works; how I am the expert in my kids and I know what’s best for them. I wanted to explain that the last two years of extreme meltdowns has taught me how to recognize when my kids are going to blow. I didn’t explain anything. They just observed my kids being awesome, why can’t we just leave it at that?

On this Whatever journey of mine, I am learning to let a lot go. That includes the pressure from strangers to guide my children in a way that makes THEM comfortable. I have to spend 24/7 with these little people. I also have to make sure they grow up to be productive members of society. I can’t cave under the pressure from outsiders and adjust my parenting style according to the standards of every stranger annoyed by my kids. I have bigger things to worry about in life; like making sure my kids aren’t throwing knives and jumping over tables.

I wanted to be angry and for a second that mama bear in me started to imagine ripping this woman’s face off. But, instead of getting angry (or removing body parts) I gave her a little tip of my glass and said, Whatever!


I am having bumper stickers of this one made.

Have you ever had a situation where you felt you wanted to defend your child to a stranger?


Kids who tantrum in public – A Parent Perspective

Last week, fellow blogger Discount Diva gave out medals to moms with children who throw tantrums. As a mom of two children with epic tantrums I am not looking for a medal, just simple understanding and space to be a parent. Let me take you through a recent experience and break down for you what I, the parent, was thinking and feeling.

The library is one of our favorite places to go. It is rare  my girls have an epic melt down there; maybe a little whining if they are not ready to leave. I usually remind them we can always come back and they’ll move on. So, I was at a complete loss as to why my one daughter went nuclear while we were at the library a few weeks ago. She knew it was time to leave and she was ready to go. We stepped into the bathroom to change her since she had an accident that soaked through her pants. As I tried to take her shoes off so I could change her she started getting whiny. This is where I start taking deep breaths because things could go either way here. She can continue to simply whine or start to completely wail. I changed her and asked her to wash her hands. Something happened from the time the paper towel hit the garbage can to the second she stepped outside the bathroom (I still have no clue what it was). She was on the floor flopping, kicking and SCREAMING. A high pitched, ear shaking scream. The kind that causes mass panic that a child is being abducted. Now here is where experts diverge. One group advises you not to react. Just keep the “demand” on her and expect that she will change her behavior. The other group advises to stop what you are doing and get down on the floor and hold your child. I have both experts arguing inside my head. I have another child in tow and I am carrying several bags packed full of kid gear who do I focus on first? I go from taking deep breaths to survival mode in only a second. It’s fight or flight and I’m looking to flee to the next open door!

There is no end to the screaming. No amount of gentle tones or soothing hugs is getting this kid to move. As we inch slowly to the door she’s screaming, “No! No! No! I don’t want to go out the door! I don’t want to go home! I don’t want to leave this place.” I start preparing my response to the CPS worker who will be greeting me when I get home. I try to muscle her through and tell her this is NOT OK. You NEED to get up and walk to the car NOW! I can feel my temperature rise and my heart beat escalate. Nothing is working and as we make our way out the door she’s screaming, “pick me up! carry me!!”

My mind is now a blurry fuzz of options: 1. I can walk away and leave her there- except we are on a busy corner with heavy traffic. 2. I could attempt to (painfully) carry everyone up the hill. 3. Just flop on the ground myself and start screaming. 4. Remain calm and drag her.  I went with #4 and I keep my focus on just making it to the car. My mind is split between just taking baby steps toward the car and praying the other kid continues to be cooperative. If they both melt down at the same time I have no choice but to just plop down with them for one hell of a cry. Not even a good cry.

That’s when “Super Grandma” jumps in with her two cents. “My grand kids act like that I just step over them.” Oh, ha ha … yes I already thought of leaving my volcanic child here on the corner of a busy street while I walk to my car 10 cars away. I smile, nod, ignore her remark and keep walking. Then I heard the words, “just a bad kid.” I swear I could feel my hair catch fire. If I wasn’t so focused on keeping it all together I would have turned around and verbally blasted this woman.

A child having a tantrum (even in public) is only a small snapshot of their day. We don’t see the bigger picture of their day. What grandma failed to recognize is how hard I was working to keep it together and not flipping out on my kid in public. She also doesn’t know about the many sleepless nights I spend wracking my brain trying to figure out what I am doing wrong as a parent, or how I beat myself up because I’m failing at this parenting gig. Lady, I can assure you this is no cake walk for me. I do not enjoy, or ignore the fact my child can’t control her own emotions yet. It is actually painful for me to watch and feel powerless.

This day it was only one kid melting down. I have experienced tandem tantrums. (That’s where both kids melt down at the SAME TIME in PUBLIC. Usually when we need to get some place on time). I have heard a lot of hurtful remarks, “there’s something wrong with your kid!” “My kids would NEVER act that way.” “You’re kids are hyper.” “Good luck with that one.” “Her behavior is over the top.” “How do you put up with that?” “She’ll NEVER learn to cope with the real world.” These comments have come from teachers, strangers and even friends and family. They are all hurtful and none of them help me resolve the issue. They all feel like an F on my parenting report card. It’s hard to not look at my kids and think, “why can’t you just be like all the other kids?”

I have learned to deflect those comments by reminding myself how beautiful my girls are. The way their smile lights up a room, how they can be absolutely charming and how incredibly smart they are. I try to remind myself that they are still learning to navigate how the world works and their place in it. It is my job to teach them how to cope and how to identify boundaries. In those moments when I am under fire by other parents (and grand parents), it is MY responsibility to role model for my girls how to handle adversity. How I respond to those comments is going to teach my children how to respond to those same personalities when they are adults. Kids aren’t going to have it right the first time around. It takes practice and it takes repetition. My kids may not fit into any one size fits all check box and that’s a good thing. I have been called “persistent” “bossy” and “defiant” too. It is those traits that have made me the most successful in life.

So Super Grandma, go ahead and make your judgments when you see my kid melt down in public. You can assume the worst of me as a parent. But, keep it to yourself. If you really want to help give me a thumbs up, tell me it only lasts a short time and maybe offer to hold my bags while I walk my kids to the car. If you can’t do any of those things then please follow this protocol:  take your right hand out of your pocket, place it over your mouth and keep walking.

To my friends and family, before you quickly judge that mom at the store who is just loosing it on her tantruming child, or you see her trying to wrestle her kid into a car seat while the kid is kicking her in the face, just think she isn’t enjoying this moment. Remember you don’t have the whole picture. This is one small peek into their day and is not an accurate reflection of this persons parenting style. It’s easy to forget that, so I offer up the same protocol listed above.

I rarely share how hard it is to have twins because I don’t want anyone to think I am looking for sympathy. Motherhood is just hard no matter the cards you are dealt. With twins, most people assume one twin is “easy going” and the other is “difficult.” I am blessed with two formidable little ones even Hercules would bow to.


The Blog Must Go on!

Today’s “no frills” blog is brought to you by the kind citizens running the local library; and that zit faced little twerp hacker sitting in his moms basement that targeted my personal computer. Alright, that’s not a fair stereotype. Maybe not ALL hackers live at home with their moms. Maybe some of them work for a government agency doing super-spy work on foreign governments. I can respect a working schlub using his hacking intelligence for the greater good! But, I can’t respect a jerk who thinks hacking the 5 year old lap top of a SAHM is going to gain anything. My ancient laptop is (sadly)  my link to the outside world. It keeps me connected to all of you, my far off family and helps me generate an income.

As soon as I realized I had been hacked I immediately logged off and could not log back on. My husband has been working for days to get it up and running. Finally, we have resolved to taking it to a professional. I had a mild panic attack about my blog. How the heck am I going to upload my fabby pics now? How am I going to keep everyone aware of our latest crafting adventures and time saving tips? I am the every SAHM- the moms want to hear from me! That’s when I had my first “aha moment!” ever. (It was like Nirvana- I saw Oprah and everything!).
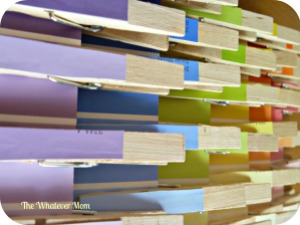
I may not be able to bring you fabby pictorial step by step tutorials of super easy crafts, but I can bring you ME. The mom behind the blog. A real look at what goes on in my world. I’m sure many of you have deep hitting moments like me and wonder, “does this happen to other moms?” So, for the next few weeks I’ll bring you the “no frills” look at my mother hood journey. But, when I get that laptop up and running I’m going the post the heck out of our awesome crafts!

So thank you, Dear Hacker Jerk, you may have sabotaged my main source of communication (and easy access to a thesaurus), but you have not sabotaged The Whatever Mom! The blog must go on!!


This might be a great time to hear from my readers! What are some topics you’d like to hear about from the Whatever Mom?
3 Fun Kid Friendly Decorations for Fall & Halloween

October is here! We can officially get excited about pumpkins and Halloween! I LOVE decorating for Fall!!! (Can never have too many exclamation points when sharing my excitement for Fall!!!). Gone are the days I can display my intricately designed, hand crafted grown up tablescapes. The delicate ensembles of thin glass hurricane lamps and the hand carved gourd tea light holders could never hold their own against the power of two Tasmanian toddlers. So, I put away anything glass, all my large ceramic pumpkins and delicate wreaths (you know all the stuff you don’t want kids touching!) for now and found some more kid friendly materials to decorate with.

Here are our favorite ways to decorate for Fall and Halloween.

Make a Monster Impression:

front door edit

This is simple, inexpensive and the kids can help! You can find everything in your dollar store.

supplies

Materials:

  • Large poster board
  • Large round paper plates (any solid color)
  • Small round, black paper plates
  • Small square paper plates (white)
  • Painters tape

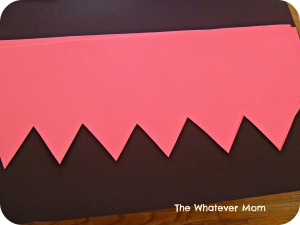
Cut poster board in half. Then cut small triangles out of one side of paper to form a hair line. Depending on your door width you may need one, or both pieces of poster board.

Cut poster board in half and cut triangles for hairline.

Next, make eyes by taping the small black plate to the large colored paper plate and attach to the door.

Last, make a toothy grin using the square white paper plates.

Feel free to embellish with glittery bats, or other Halloween shapes. We decided to go with a girl monster this year and gave “Henrietta” some sparkly bat barrettes. My girls enjoyed posing with their monster afterward for our annual Fall pic!


Acorn Jewels:

Finished jewels. Display among other gems, or alone in a basket, on a tray.

One of our favorite things to do in the Fall is to collect acorns that fall off the Oak tree in our back yard. This year I found a fun project that is easy and super cheap.  We saved all our acorn caps in a cup and I pulled them out on a rainy day we needed something to do.

Materials:

  • Acorn tops (must be dry, clean and free from cracks)
  • Markers
  • Elmer’s Glue
  • Gems, or stones
  • Tray

Start with a layer of rocks, or gems on your tray. These will secure acorn tops in place.

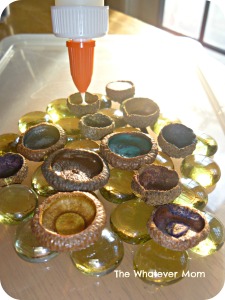
Next, color the inside of the tops with a marker. It will look rough, but that’s ok!

Color in the acorn caps with favorite color markers.

Then pour Elmer’s school glue into each top and fill to the rim. Leave over night to dry and you won’t believe the effect!

Simply fill with Elmer's school glue and allow to dry over night.
Simply fill with Elmer’s school glue and allow to dry over night.

Have the kids check back to watch the colorful transformation.

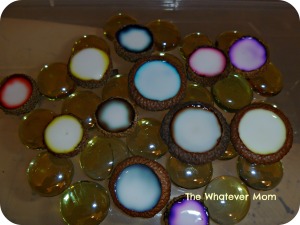
The glue starts to soak up the colors and eventually turn clear; leaving behind a shiny coating of color.

What you have left are smooth, colorful jewels! I leave these in a basket of decorative pumpkins for easy access for the kids to play with.


Pumpkins, Pumpkins and more Pumpkins!

You simply cannot have enough pumpkins this time of year! We eat them, drink them and decorate with them! We have baskets filled with little decorative pumpkins, we color pumpkins, paint pumpkins and even carve our pumpkins.

pumpkins

Materials:

  • Pumpkins
  • Acrylic paints
  • Paint brushes -OR-
  • Carving tools

Our carving tradition is spearheaded by my hubby. He helps the girls select just the right family of pumpkins. Then they pour over different pumpkin design ideas before making the first cut. My girls are not squeamish at all about digging right in and squishing the pumpkin guts through their fingers.

Hubby manning the gore!

Here are last year’s creations:

jack o lanterns

Confession: we made a trip to a pumpkin farm for the whole experience of seeing a real pumpkin patch, but I purchased our carving pumpkins for $2.88 each at Aldi’s. Whatever my kids have no idea…and by not spending $20 for one pumpkin (our above grand total for our cute monster, colorful acorn jewels and 3 carving pumpkins is $14.68) I purchased a few extra pumpkin lattes, pumpkin fritters, pumpkin muffins and pumpkin flavored pumpkins. Did I mention we like pumpkin?

For little ones not yet trustworthy with knives, give them a paint brush and some paints and let them paint their pumpkins!

All these crafts are fun for kids, easy to make and indestructible! Happy Fall Ya’ll!

What would your toddler think of a front door monster?


Happy CrOcktober

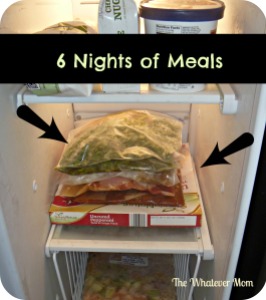
Have I shared with all of you how much I love my crock pot? My love affair with slow cooking began a few months after my twins were born. It takes a lot of work to put a hot dinner on the table while adjusting to life with kids! Once I got over the fear of burning down the house  and gave my crock pot a try there was just no turning back! In less than one hour a week I prep 5 week night meals and put in the freezer, then I let the crock pot do all the heavy lifting. Now, I’m not juggling the evening dinner rush with prime time tantrums, phone calls and my own end of day melt down.

I am often asked to share some of my favorite recipes. I have collected a bunch over time and have no idea where I picked them up from (somewhere on the great world wide web), and I have my go-to sites to check out new ones. Here are seven “pop and drop” freezer meals I make most often. Pop and drop means there’s no chopping or dicing. You simply add your chicken and pop open a few cans/jars and dump all into one freezer bag. Your prep is complete. I’m guessing you may not want to eat a full week of chicken dinners, but maybe you’ll find one or more to liven up your freezer meal rotation.

Click links below for free recipe printable:

Lazy Tex Chili

Pesto Chicken with Green Beans

Thai Chicken

Hawaiian Chicken

Chicken Alfred with Broccoli

Maple Dijon Chicken

Creamy Salsa Chicken

NOTE: My kids are picky eaters so I usually make them mac and cheese on the side, but even when they do share our meals there are still plenty of left overs for hubby and I to enjoy for lunch. Even if you do not have kids this is still a pretty awesome system! Imagine not worrying about spending 30 minutes to prepare one meal, or wondering what’s for dinner? I wish I knew about freezer cooking before I even had kids.

quick tips


A few of my favorite sites to find dinner inspiration:

http://wp.sixsistersstuff.com/?s=freezer+meals


MexPumpSoup2ZZ77

http://glutenfreegoddess.blogspot.com/2006/01/mexican-pumpkin-soup.html


http://paleopot.com/2012/11/paleo-roasted-red-pepper-sweet-potato-soup/


Leave a comment below with your favorite crock pot freezer meal site!


3 Easy Steps to Feel Organized

Every week for nearly the last four years I have proclaimed, “THIS is the week I get organized!” I really mean it when I say this. But, the reality of taking care of the other humans in my home leaves me little time to organize like Martha (as in Stewart). I admit it is disappointing to open the closet to find things spilling out, or open the dresser drawers and see all the mangled clothes. I always feel pressed for time as we race through our mornings before to leaving for school, or getting to a play date. But, Martha doesn’t live here so it’s up to me to make things orderly and accessible.

So, how does a busy twin mom without a moment to spare get organized? Well, first I had to throw away my vision of what  organized looks like and really think about what it feels like. Being organized feels less rushed and less like I am behind on tasks. It feels less stressed. So, what stresses me out the most? Snacks, mealtimes and getting my kids dressed. I often forget to give myself a snack, or suddenly a child is melting down because I forgot to feed them. It is stressful pulling out one shirt after another until my kid finds THE ONE she likes. Suddenly it’s 4:30 in the afternoon and I forgot I have to make dinner! Ack!

Here is my “Master plan” to feeling organized:

SNACK TIME PREP

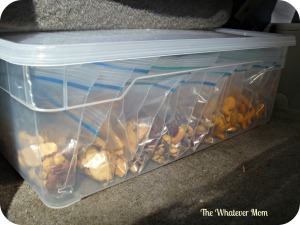
Use snack sized Ziploc bags to divide up kid sized portions of their favorite snacks.

I divided our snacks into kid friendly portions by using Ziploc snack bags. I measured according to serving size, filled bags then I piled them into a clear plastic box and left on a shelf in a cupboard the girls can reach.

Create an easy-to-reach snack shelf in the fridge for fresh snacks.

Next, I set up a shelf in the fridge with squeezable yogurts, carrot sticks, apple slices and drinks they can just grab and go. This alleviates my stress of preparing snacks on demand and gives my girls a bit more independence.

Keep snacks in car to ward off meltdowns on the road.

Don’t forget snacks for the car! This is my back up in case I forget to grab the snack bag!

Total prep time = 20 minutes (maybe 30 if you let the kids help). Time saved = 1.5 hours of prepping or chopping snacks on demand while the kids complain they didn’t want “thaaaat snack.”


DINNER TIME PREP

Prep ahead crock pot freezer meals are a HUGE time saver!

I have collected over a months worth of freezer crock pot meals my family will actually eat. I make my menu for the week, buy all my groceries and return home to assemble into Ziploc bags and freeze.

Total prep time = 1 hour. Total time saved = 6 hours.


CLOTHING PREP

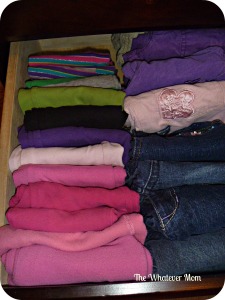
Kids can see all their options at once.

My kids will not pick out their clothes the night before and stick to wearing that outfit by morning. By simply adding one more fold line to our shirts and pants I save a whole lot of space AND my kids can see all their options at once. For shirts I use a modified ‘Gap fold’ (it’s a real thing Google it!) and then I fold in half one more time. THAT’S IT!

gap fold
Not a true Gap Fold, but your shirts should look like this.
Fold one more time and stack several shirts together before lying down in the drawer.


Fold pants one extra fold, stack and lie down in drawer.

This saves me the time (and torture) of watching my kids pull out one shirt at a time to get to the one they want.

Total prep time = mere seconds added to folding time. Total time saved = 40 minutes a week!


So, if you like math here are the numbers: Total Prep Time = 1 hour 20 minutes Total Time Saved = 8 hours 30 minutes

Feeling organized and saving hours of stress = PRICELESS!

What are your time saving secrets to keeping your family organized?


I had this fantasy that I was going to home school my children. It sounded like fun at the time, but then the reality of being out numbered by two feisty little divas quickly changed my mind. But, I did want to teach them some basics like letters and numbers. So I started on a journey to teach my kids their ABC’s and 123’s. I am not a certified teacher so I have no idea how to formally teach, but I do know how to have fun and that my kids really like learning. I introduced our ABC’s and 123’s in some pretty fun ways and with repetition. You don’t need flash cards or need to spend hours teaching your child. Just incorporate teachable moments  into some every day activities and make it fun! I started introducing letters and numbers when my girls were around 18 months. By the time they were 26 months they had mastered ABC’s and could count to 20.

Here are 10 fun ways to introduce letters and numbers to your toddler:

EAT YOUR ALPHABET

abc

Cookies–  use your favorite sugar cookie recipe. We simply roll out a tube of store bought sugar cookie dough and press out letter shapes. You can go simple and stick to one letter per week, or go all out and help spell words with your cookies. Either way your kiddo will love the end result and it will be a fun experience.

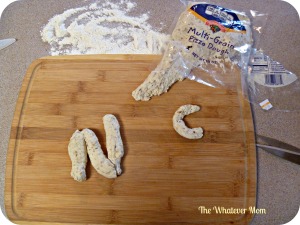
Pick up premade bread dough or pizza dough to create letter shapes

Pretzels– use store bought pizza or bread dough to make pretzels. Start by pulling off a small piece and rolling into a snake (kids love this part) and help kids form a letter.

Alphabet soup– can’t get any easier than that. Pop a can top and pour, or make from scratch. Whatever works for you!

Sandwiches – use letter cutters to cut shapes out of bread and let your kid slather on the PB&J.

Pancakes – use a squeeze bottle to mix and squirt pancake batter onto hot griddle. Cook and enjoy!


SENSORY ABC’s

Cut out letters from play dough

Play dough– cut letters out of play dough for an interactive alphabet experience.

Shaving cream– spray shaving cream (or whipped cream, yogurt, pudding) onto a tray and show your kids how to make letters using their finger tips. If you worry about the mess your little one will make, squirt shaving cream into a plastic baggie and let the air out. They can trace a letter on the bag and the shape will remain.

Letter hunt– print out letters (or write on index cards) and hide for you kid to find in your yard or around your house. Take the hunt to the streets and point out letters you see while driving through your neighborhood, or while you are at the store.


CREATE YOUR ABC’s

Use letter stamps to help kids identify letters

Stamp it out– use colorful letter stamps to create an alphabet gallery.

Cut letters from magazines and glue to page for a letter collage

Letter collage– help kids find letters in old magazines to cut out and paste on paper to make a collage.

Print out dot paint ABC's and let kids paint
Print out dot paint ABC’s and let kids paint

Dot paints or bingo dauberson do-a-dot sheets. I printed these out from http://www.dltk-teach.com/alphabuddies/daubers/

Whatever you do to help your toddler learn make sure it is fun! Never put any pressure to perform or learn quicker than they are ready. Kids all learn at their own pace.

What are some of your favorite fun toddler activities?


3 Fun Ways to Use Paint Swatches

Let me start this post with a confession: once the kids go back to school I kind of go on auto pilot with the whole educational crafting at home thing. I feel like I did my due diligence and picked just the right school for them with teachers who are way more patient…er um, qualified than I am. My kids really truly love going to school. They also love to match colors, sort things and use scissors (which are kept under lock and key). Even after 3 hours of learning at school they like to come home to play with puzzles, string beads and make (ugh) more art projects.

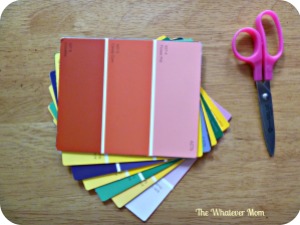
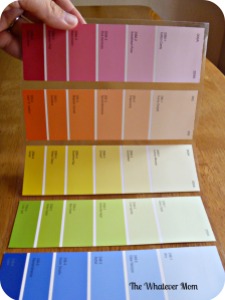
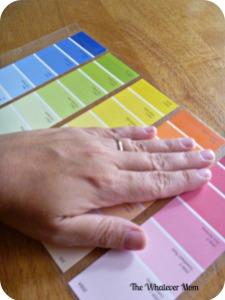
Now that they are learning to write their names and draw shapes, it’s time for my kids to hone those fine motor skills. Those are the skills that help them write, use scissors, buttons and zippers, etc. So, I took their love of colors and matching and made these fun activities for them using some (FREE) paint swatches from the hard ware store.

MATERIALS:

supplies edit
All the materials you need to make the 3 activities below.

2 matching sets of swatches. I selected each color of the rainbow.

Liquid glue

Scissors

Clothe’s pins

Contact paper (optional)


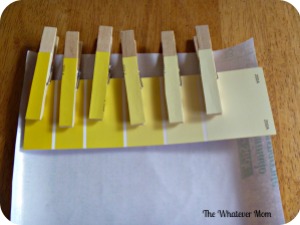
COLOR MATCHING

pins edit
A rainbow of colors ready for matching.

My mom actually helped me make these. She did it really quick while watching TV with the kids. What? I had my hands full potty training twins and, she had a couple of extra free hands so I put her to work.

Cut thin strips from each color on the color swatch- as wide as your clothes pin. Next, glue the strip onto clothes pin. Once everything dries kids can match the color on the pin to the color on the swatch. Like this:

match edit
Kids can clip the matching colors on the clothes pin to the swatch.


SCISSOR CUTTING

scissors
Help kids cut on the white line separating the colors.

This one really requires little or no effort on your part. Just supervision with the scissors. It’s all fun and games until someone’s bangs go missing. Help your kids hold the swatch and cut on the white line between colors. Great practice for scissor skills.


SPELLING

laminate
Laminating swatches ensures several uses.

I laminated my swatch strips for durability and so I can use a washable dry erase marker on them. Confession #2: I do not own a laminate machine. I used clear contact paper. Yes, you can use clear contact paper in place of laminate for many projects. We pull out a laminated swatch and I write the letters on each square and help the girls spell the names of the colors.

Contact paper laminate is easy to do:

Simply cut contact paper to size of item you are covering.
Place second piece of contact paper over item and smooth out using your hand.

The key to using contact paper as laminate is to move slowly, and smooth out any air bubbles as you go. This faux-laminate is durable enough to withstand the pull of Velcro for any projects with movable pieces.

Wondering what else you can make with color swatches from the hardware store? Check out a few of my favorite finds:

How to start your own city swap

With summer winding down I took a look at our summer bucket list. It was fun counting up all the things we have checked off. What a busy summer it has been! It feels like we just made our list yesterday and I can’t believe how quickly this summer has passed!

One special bucket list item we still have left on our list is starting a city swap. I was inspired by those posts from Little Passports that keep popping up in my Facebook news feed. You can choose a monthly payment option which starts around $15/month to receive an explorer kit with info about another country. These kits are geared toward 5-10 year old kids. Nothing for the preschool crowd. But, even preschoolers love getting mail. So, a friend and I decided it would be fun to for our kids to swap facts about the cities we live in. It’s a more personalized way to get to know the world outside of our home town; it’s like having a pen pal but with a twist. (And no financial commitment).

Here’s how I started:

I made a list of important city traits. For example, I live in a former port city so the Hudson River and our light house is a special part of our local culture. Art, music and food are all very important in our city as well. We made a trip to our library to narrow down some information about our city. The girls and I found these great activity guides with facts and educational games about our local ecology. We also found some post cards featuring local art and additional pamphlets to share. Such a fun way for our friend to learn about our city!

Now that we had a few fun things to include in our swap, we decided to introduce ourselves to our new little pal by sending a message in a bottle.  (Keeping with our port theme).

blog-005 edit

We recycled a seltzer bottle by rinsing the inside and stripping the label from the outside. Once the bottle was dry we added our letter and fun facts about our city.

Next, we made a trip to the post office to determine the amount of postage needed to send our bottle. Did you know you can send almost anything in the mail? The woman at the post office said she once received an actual coconut! For some fun, inspiring ideas for sending your own happy mail check out this cool blog www.giverslog.com 

We brought our bottle home and added our stamps. We left it in our mail box for the postal carrier. Wonder what he thought of our silly package?

pen-pal-blog 3

Our next package will include a special surprise. Another short informational pamphlet about one of our favorite hikes, AND these little “water chestnuts.” Thousands of these little black, spiky things liter the shoreline every summer. The locals call them “cow heads.” Since my friend and her son live more inland we thought this might be fun to share. It will definitely seem unusual. These little things are iconic in our hometown.

Again, we recycled something we already have. This time a spice jar. I rolled up the pamphlet and inserted the chestnut shells inside.

spice jar

Here are our first two packages before labels and stamps.

blog-012 edit

This little project has definitely sparked some creativity and challenged our imaginations. The girls love assembling the packages the most. They also enjoy visiting the post office and seeing how everything there works.

Our next few packages will include some local art, maybe some local music and some sweet treats from our favorite chocolatier. Each item we include will of course need a creative package to carry it through the mail. The idea is to share things that make our city so special while getting to know a new friend and the city he lives in. These packages are geared toward tots so the info has to be short, simple and fun.

This is a really fun, creative way for young kids to send and receive mail; or for older kids to keep in touch with friends they met at summer camp, or far away friends and family. As a bonus it’s just fun to get something so unexpected in the mail.

What are some fun things you have sent in the mail?


error

Building a community one click at a time.