Today’s “no frills” blog is brought to you by the kind citizens running the local library; and that zit faced little twerp hacker sitting in his moms basement that targeted my personal computer. Alright, that’s not a fair stereotype. Maybe not ALL hackers live at home with their moms. Maybe some of them work for a government agency doing super-spy work on foreign governments. I can respect a working schlub using his hacking intelligence for the greater good! But, I can’t respect a jerk who thinks hacking the 5 year old lap top of a SAHM is going to gain anything. My ancient laptop is (sadly) my link to the outside world. It keeps me connected to all of you, my far off family and helps me generate an income.
As soon as I realized I had been hacked I immediately logged off and could not log back on. My husband has been working for days to get it up and running. Finally, we have resolved to taking it to a professional. I had a mild panic attack about my blog. How the heck am I going to upload my fabby pics now? How am I going to keep everyone aware of our latest crafting adventures and time saving tips? I am the every SAHM- the moms want to hear from me! That’s when I had my first “aha moment!” ever. (It was like Nirvana- I saw Oprah and everything!).
I may not be able to bring you fabby pictorial step by step tutorials of super easy crafts, but I can bring you ME. The mom behind the blog. A real look at what goes on in my world. I’m sure many of you have deep hitting moments like me and wonder, “does this happen to other moms?” So, for the next few weeks I’ll bring you the “no frills” look at my mother hood journey. But, when I get that laptop up and running I’m going the post the heck out of our awesome crafts!
So thank you, Dear Hacker Jerk, you may have sabotaged my main source of communication (and easy access to a thesaurus), but you have not sabotaged The Whatever Mom! The blog must go on!!
This might be a great time to hear from my readers! What are some topics you’d like to hear about from the Whatever Mom?
October is here! We can officially get excited about pumpkins and Halloween! I LOVE decorating for Fall!!! (Can never have too many exclamation points when sharing my excitement for Fall!!!). Gone are the days I can display my intricately designed, hand crafted grown up tablescapes. The delicate ensembles of thin glass hurricane lamps and the hand carved gourd tea light holders could never hold their own against the power of two Tasmanian toddlers. So, I put away anything glass, all my large ceramic pumpkins and delicate wreaths (you know all the stuff you don’t want kids touching!) for now and found some more kid friendly materials to decorate with.
Here are our favorite ways to decorate for Fall and Halloween.
Make a Monster Impression:
This is simple, inexpensive and the kids can help! You can find everything in your dollar store.
Materials:
Large poster board
Large round paper plates (any solid color)
Small round, black paper plates
Small square paper plates (white)
Painters tape
Cut poster board in half. Then cut small triangles out of one side of paper to form a hair line. Depending on your door width you may need one, or both pieces of poster board.
Cut poster board in half and cut triangles for hairline.
Next, make eyes by taping the small black plate to the large colored paper plate and attach to the door.
Last, make a toothy grin using the square white paper plates.
Feel free to embellish with glittery bats, or other Halloween shapes. We decided to go with a girl monster this year and gave “Henrietta” some sparkly bat barrettes. My girls enjoyed posing with their monster afterward for our annual Fall pic!
Acorn Jewels:
Finished jewels. Display among other gems, or alone in a basket, on a tray.
One of our favorite things to do in the Fall is to collect acorns that fall off the Oak tree in our back yard. This year I found a fun project that is easy and super cheap. We saved all our acorn caps in a cup and I pulled them out on a rainy day we needed something to do.
Materials:
Acorn tops (must be dry, clean and free from cracks)
Markers
Elmer’s Glue
Gems, or stones
Tray
Start with a layer of rocks, or gems on your tray. These will secure acorn tops in place.
Next, color the inside of the tops with a marker. It will look rough, but that’s ok!
Color in the acorn caps with favorite color markers.
Then pour Elmer’s school glue into each top and fill to the rim. Leave over night to dry and you won’t believe the effect!
Simply fill with Elmer’s school glue and allow to dry over night.
Have the kids check back to watch the colorful transformation.
The glue starts to soak up the colors and eventually turn clear; leaving behind a shiny coating of color.
What you have left are smooth, colorful jewels! I leave these in a basket of decorative pumpkins for easy access for the kids to play with.
Pumpkins, Pumpkins and more Pumpkins!
You simply cannot have enough pumpkins this time of year! We eat them, drink them and decorate with them! We have baskets filled with little decorative pumpkins, we color pumpkins, paint pumpkins and even carve our pumpkins.
Materials:
Pumpkins
Acrylic paints
Paint brushes -OR-
Carving tools
Our carving tradition is spearheaded by my hubby. He helps the girls select just the right family of pumpkins. Then they pour over different pumpkin design ideas before making the first cut. My girls are not squeamish at all about digging right in and squishing the pumpkin guts through their fingers.
Hubby manning the gore!
Here are last year’s creations:
Confession: we made a trip to a pumpkin farm for the whole experience of seeing a real pumpkin patch, but I purchased our carving pumpkins for $2.88 each at Aldi’s. Whatever my kids have no idea…and by not spending $20 for one pumpkin (our above grand total for our cute monster, colorful acorn jewels and 3 carving pumpkins is $14.68) I purchased a few extra pumpkin lattes, pumpkin fritters, pumpkin muffins and pumpkin flavored pumpkins. Did I mention we like pumpkin?
For little ones not yet trustworthy with knives, give them a paint brush and some paints and let them paint their pumpkins!
All these crafts are fun for kids, easy to make and indestructible! Happy Fall Ya’ll!
What would your toddler think of a front door monster?
I had this fantasy that I was going to home school my children. It sounded like fun at the time, but then the reality of being out numbered by two feisty little divas quickly changed my mind. But, I did want to teach them some basics like letters and numbers. So I started on a journey to teach my kids their ABC’s and 123’s. I am not a certified teacher so I have no idea how to formally teach, but I do know how to have fun and that my kids really like learning. I introduced our ABC’s and 123’s in some pretty fun ways and with repetition. You don’t need flash cards or need to spend hours teaching your child. Just incorporate teachable moments into some every day activities and make it fun! I started introducing letters and numbers when my girls were around 18 months. By the time they were 26 months they had mastered ABC’s and could count to 20.
Here are 10 fun ways to introduce letters and numbers to your toddler:
EAT YOUR ALPHABET
Cookies– use your favorite sugar cookie recipe. We simply roll out a tube of store bought sugar cookie dough and press out letter shapes. You can go simple and stick to one letter per week, or go all out and help spell words with your cookies. Either way your kiddo will love the end result and it will be a fun experience.
Pick up premade bread dough or pizza dough to create letter shapes
Pretzels– use store bought pizza or bread dough to make pretzels. Start by pulling off a small piece and rolling into a snake (kids love this part) and help kids form a letter.
Alphabet soup– can’t get any easier than that. Pop a can top and pour, or make from scratch. Whatever works for you!
Sandwiches – use letter cutters to cut shapes out of bread and let your kid slather on the PB&J.
Pancakes – use a squeeze bottle to mix and squirt pancake batter onto hot griddle. Cook and enjoy!
SENSORY ABC’s
Cut out letters from play dough
Play dough– cut letters out of play dough for an interactive alphabet experience.
Shaving cream– spray shaving cream (or whipped cream, yogurt, pudding) onto a tray and show your kids how to make letters using their finger tips. If you worry about the mess your little one will make, squirt shaving cream into a plastic baggie and let the air out. They can trace a letter on the bag and the shape will remain.
Letter hunt– print out letters (or write on index cards) and hide for you kid to find in your yard or around your house. Take the hunt to the streets and point out letters you see while driving through your neighborhood, or while you are at the store.
CREATE YOUR ABC’s
Use letter stamps to help kids identify letters
Stamp it out– use colorful letter stamps to create an alphabet gallery.
Cut letters from magazines and glue to page for a letter collage
Letter collage– help kids find letters in old magazines to cut out and paste on paper to make a collage.
Print out dot paint ABC’s and let kids paint
Dot paints or bingo daubers – on do-a-dot sheets. I printed these out from http://www.dltk-teach.com/alphabuddies/daubers/
Whatever you do to help your toddler learn make sure it is fun! Never put any pressure to perform or learn quicker than they are ready. Kids all learn at their own pace.
What are some of your favorite fun toddler activities?
Let me start this post with a confession: once the kids go back to school I kind of go on auto pilot with the whole educational crafting at home thing. I feel like I did my due diligence and picked just the right school for them with teachers who are way more patient…er um, qualified than I am. My kids really truly love going to school. They also love to match colors, sort things and use scissors (which are kept under lock and key). Even after 3 hours of learning at school they like to come home to play with puzzles, string beads and make (ugh) more art projects.
Now that they are learning to write their names and draw shapes, it’s time for my kids to hone those fine motor skills. Those are the skills that help them write, use scissors, buttons and zippers, etc. So, I took their love of colors and matching and made these fun activities for them using some (FREE) paint swatches from the hard ware store.
MATERIALS:
All the materials you need to make the 3 activities below.
2 matching sets of swatches. I selected each color of the rainbow.
Liquid glue
Scissors
Clothe’s pins
Contact paper (optional)
COLOR MATCHING
A rainbow of colors ready for matching.
My mom actually helped me make these. She did it really quick while watching TV with the kids. What? I had my hands full potty training twins and, she had a couple of extra free hands so I put her to work.
Cut thin strips from each color on the color swatch- as wide as your clothes pin. Next, glue the strip onto clothes pin. Once everything dries kids can match the color on the pin to the color on the swatch. Like this:
Kids can clip the matching colors on the clothes pin to the swatch.
SCISSOR CUTTING
Help kids cut on the white line separating the colors.
This one really requires little or no effort on your part. Just supervision with the scissors. It’s all fun and games until someone’s bangs go missing. Help your kids hold the swatch and cut on the white line between colors. Great practice for scissor skills.
SPELLING
Laminating swatches ensures several uses.
I laminated my swatch strips for durability and so I can use a washable dry erase marker on them. Confession #2: I do not own a laminate machine. I used clear contact paper. Yes, you can use clear contact paper in place of laminate for many projects. We pull out a laminated swatch and I write the letters on each square and help the girls spell the names of the colors.
Contact paper laminate is easy to do:
Simply cut contact paper to size of item you are covering.Place second piece of contact paper over item and smooth out using your hand.
The key to using contact paper as laminate is to move slowly, and smooth out any air bubbles as you go. This faux-laminate is durable enough to withstand the pull of Velcro for any projects with movable pieces.
Wondering what else you can make with color swatches from the hardware store? Check out a few of my favorite finds:
With summer winding down I took a look at our summer bucket list. It was fun counting up all the things we have checked off. What a busy summer it has been! It feels like we just made our list yesterday and I can’t believe how quickly this summer has passed!
One special bucket list item we still have left on our list is starting a city swap. I was inspired by those posts from Little Passports that keep popping up in my Facebook news feed. You can choose a monthly payment option which starts around $15/month to receive an explorer kit with info about another country. These kits are geared toward 5-10 year old kids. Nothing for the preschool crowd. But, even preschoolers love getting mail. So, a friend and I decided it would be fun to for our kids to swap facts about the cities we live in. It’s a more personalized way to get to know the world outside of our home town; it’s like having a pen pal but with a twist. (And no financial commitment).
Here’s how I started:
I made a list of important city traits. For example, I live in a former port city so the Hudson River and our light house is a special part of our local culture. Art, music and food are all very important in our city as well. We made a trip to our library to narrow down some information about our city. The girls and I found these great activity guides with facts and educational games about our local ecology. We also found some post cards featuring local art and additional pamphlets to share. Such a fun way for our friend to learn about our city!
Now that we had a few fun things to include in our swap, we decided to introduce ourselves to our new little pal by sending a message in a bottle. (Keeping with our port theme).
We recycled a seltzer bottle by rinsing the inside and stripping the label from the outside. Once the bottle was dry we added our letter and fun facts about our city.
Next, we made a trip to the post office to determine the amount of postage needed to send our bottle. Did you know you can send almost anything in the mail? The woman at the post office said she once received an actual coconut! For some fun, inspiring ideas for sending your own happy mail check out this cool blog www.giverslog.com
We brought our bottle home and added our stamps. We left it in our mail box for the postal carrier. Wonder what he thought of our silly package?
Our next package will include a special surprise. Another short informational pamphlet about one of our favorite hikes, AND these little “water chestnuts.” Thousands of these little black, spiky things liter the shoreline every summer. The locals call them “cow heads.” Since my friend and her son live more inland we thought this might be fun to share. It will definitely seem unusual. These little things are iconic in our hometown.
Again, we recycled something we already have. This time a spice jar. I rolled up the pamphlet and inserted the chestnut shells inside.
Here are our first two packages before labels and stamps.
This little project has definitely sparked some creativity and challenged our imaginations. The girls love assembling the packages the most. They also enjoy visiting the post office and seeing how everything there works.
Our next few packages will include some local art, maybe some local music and some sweet treats from our favorite chocolatier. Each item we include will of course need a creative package to carry it through the mail. The idea is to share things that make our city so special while getting to know a new friend and the city he lives in. These packages are geared toward tots so the info has to be short, simple and fun.
This is a really fun, creative way for young kids to send and receive mail; or for older kids to keep in touch with friends they met at summer camp, or far away friends and family. As a bonus it’s just fun to get something so unexpected in the mail.
What are some fun things you have sent in the mail?
Hard to believe August is here already! Everyone seems to be gearing up for back-to-school and lining up their routines. I’m still enjoying the longer days of sunshine and the slower pace of summer. Some days seem longer than others, like the days when kinds are cranky and do not want to get into the bath. Raise your hand if you’ve ever scrubbed down a screaming kid just to get the bath time routine over with. Some nights the kids are not cooperative (some nights I’m not cooperative). I decided to try a new tactic. Make bath time the final activity of the day rather than the last chore of the day.
Add food coloring to ice cube trays, small animals, gems or toys for fun surprise.
On really hot days we started throwing frozen ice cubes into the bath water to get a giggle. Then I froze some ice cubes with food coloring. Then as a goofy surprise I added some gems and small zoo animals to the ice cubes. The kids thought this was hilarious. The food coloring will turn the water all kinds of colors as the ice melts and colors mix. To be sure none of the color sticks to the tub or the kids, I add a little soap to the water when filling the bath. Some time ago, my friend Erin shared her recipe for bathtub paints. What a fun idea! Plus, the mess is contained in the tub and washes away completely. The girls LOVED it and beg to do this at least once or twice a week. I love this one too because it’s so easy, it cleans up quick and it buys me a good 30 minutes of quiet.
Add food coloring to shaving cream for fun bath tub paint.
Simply dispense shaving cream into a small bowl, add a few drops of food coloring and mix. Hand it to your kid with a paint brush and let them go. We chose blue and green for an under-the-sea paint party- complete with ocean blue water and seaweed on the walls. I’m not a tile expert, but so far this has not left any stains on our tile walls. I rinse immediately and spray with a homemade peroxide-based cleaner to keep color from setting into grout. (Tip- you can use this activity while on vacation to get kids into the bath after a fun filled day. Use the blue shaving gel for easy color and zero stains on grout!).
Under the sea tub water.
Some other fun we’ve had in the tub:
Good ol’ glow sticks! We discovered this awesomeness while on our first family vacation. We were worried our kids would not take a bath in a strange tub. The first night of our trip we dimmed the lights and threw some glow sticks in the bottom of the clear water and they got right in.
Ring toss! Let a few rubber ducks float on the water and give kids a glow bracelet or necklace to toss around the ducks.
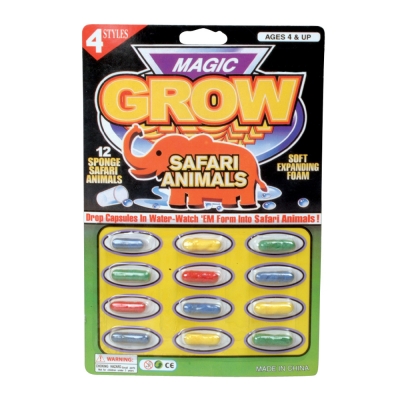
Grow a pet found at most dollar stores.
Grow a pet in the tub. You can find a package of grow-a-pet shaped sponges at almost any dollar store. These little fun-shaped sponges are encapsulated and once introduced to water they grow into fun little sea creatures, bugs, or safari animals.
You can never go wrong with a good old-fashioned bubble bath. We like to add in some fun colored shower puffs and blow bubbles to fill the air with. My girls have even enjoyed candle light with their bubble bath. (Ahem…a luxury mom doesn’t even get anymore).
So, if you’re just trying to push through bath time, or are looking for ways to make it a more quiet part of your day try any one of these fun ideas to make it the last activity of your day! (Works great any time of year, not just the long days of summer).
The other day I cracked under the pressure of potty training the twins alone while my husband was away for FIVE days. I took to social media to share my plight. I described my fantasy of checking into a hotel for three days to shower for 8 hours alone, eat some chocolate cake and watch hours upon hours of mindless TV. Judging by some of the comments not everyone shared my enthusiasm for moms taking alone time.
For the record, I don’t want to spend time away from my kids. I just want to unplug from the demands of my day job. Being home with kids 24/7 is hard work. I would love a break now and then. That’s why I look forward to Mom’s Night Out (MNO)! Whether it’s going out for drinks or dinner or my new favorite, Vine Van Gogh paint night, moms *NEED* a time out!
Vine Gogh Paint Night
Here is why I love a night out once in a while:
Spending all my time tuned into the demands of 3-year-olds obscures my link to other humans. I could go days without chatting to another adult. Sometimes I long to be connected to the rest of the world. I don’t mean the dramas of Facebook, but an honest connection with friends. When I spend time with other people it feels like I have more people in my circle than just princesses and Strawberry Shortcake. (FYI: totally a snooty bunch).
My circle of peeps.
When I leave hubby in charge for a night it makes him more aware of the amount of work it takes to get our kids from the breakfast table to bedtime. It’s a bonus if he has to handle the bedtime shenanigans all by himself. Plus, it’s great daddy-daughter bonding time, right?
Sharing war stories with other moms gives me perspective. My kids do stupid things all the time. In the moment of cleaning it all up I’m not laughing… until I hear about how it happened to some other mom. Stuff is just way funnier when its not happening to you! It reminds me that I am not living in a bubble and that all of the stress of parenting is temporary. Yes. Even 18 years is temporary. One day soon I’ll be sending them off on the school bus to spend 6 hours of their day with other people. Then like a week later they’ll start college!
When I talk to other adults and use big words like “legalization” and “perfunctory,” it reminds me I am smart and stuff. It makes me feel like those few remaining brain cells clustered way in the back haven’t failed me!
When I spend too much time with poop it makes me ‘hatey.’ Five days alone with twins who are potty training is insanity … no it’s twinsanity! No one should ever have to clean up that much poop. Ever.
Back when I was a ‘working girl’ I’d count down the week till Friday at 5 o’clock! Then I could check out of my work week and head out for nom-noms and beer. Now my 5 o’clock countdown is for bedtime with no promise of nom-noms or beer. Except on Mom’s Night!
No skills required! Just you, some friends and some fun!
Actual Facebook fantasy status update:After this week alone (that’s 5 days in a row) while hubby was away for work (eating steak for dinner, talking to humans and sleeping in a cushy hotel) I realize something: All I want for my birthday is to check into a hotel for 2 maybe 3 days, take a 8 hour hot shower alone, order some fresh hot food and sit down while I eat it….maybe even lie in bed and eat it… yeah, totally lie in bed and eat it. Might binge on a little (or a lot of) chocolate cake. Watch actual live TV and sleep. I’m not even going to get dressed, just wear a robe. Then I’m going to wake up and take a nap before my lunch of chocolate cake and champagne. I might text a few mom friends while I’m at it and tell them to make up an excuse to get out of the house. Say you need to run to Target for ‘lady supplies’ and drive over here to hang out for a few hours. I’ll put on clothes and we’ll just laugh and eat and watch TV. It will be great!
Greetings on this rainy 4th of July! If your day is starting out like ours, you may need some ideas on how to spend this rainy day inside with your little ones. Below is a recap of some fun things to do while stuck inside.
Today is the perfect opportunity to check off some of those summer bucket list items! If you haven’t made your summer bucket list yet there’s still plenty of time! Or you can just use this 2014 Summer Bucket List printable.
Arrrr ya ready for an indoor Pirate adventure? Take some time to make a map then hide treasures around the house and find them using your map.
Final maps
Did you miss my post on making pinwheels? This is a quick, fun activity to do with the kids. Use whatever paper you have on hand!
Final product
How about simply bringing out the paints and paper and let the kids run wild? Here are some easy, fun July 4th craft ideas.
So you just blew through all the crafts in less than an hour, now what? Who says you have to stay inside ALL day? Why not let your kids run outside to play in the rain? Every kid loves dancing n the rain! They are only little once! Maybe it will inspire you to host your own Mess Fest later this summer?
The perfect day for puddle jumping!
However you choose to spend your day I hope it is relaxing, safe and enjoyable. Happy July 4th everyone!
Help me welcome Pamela from Creating Barefoot! Pamela is a busy mom, Barefoot Books Rep, Blogger, Painter and an all around super mom! She is sharing with us how to make watermelon cupcakes. Curious? Read on! Oh and there’s a giveaway too! Read through to the end for details!
Pamela from Creating Barefoot
I am beyond thrilled to be a guest blogger for The Whatever Mom! I have followed her blog since day one; and I have loved and related to each and every post. Before kids I was a complete planner, over-achiever and detailed person. Now that I have 2 very different boys constantly running in different directions, with different wants, and likes and tastes I have certainly come to take on the “whatever” mantra myself.
My older son, completely unlike his mother, will not put a piece of chocolate to his mouth. No ice cream, no cake, no frosting, no candy bars. But put a bowl of fruit in front of him and he will devour it and ask for more. Of course not something I mind, though hard to lure him with bribes of sweet treats when I need to give him a little extra incentive.
Like any new, over- achiever mom I slaved over his first birthday cake. A beautiful sesame street chocolate cake covered in yummy butter cream and sweet fondant Elmo faces. He wouldn’t touch it, let alone try a piece. I thought great, I won’t have to worry about the sugar high later.
By his second birthday I felt bad he wouldn’t eat his own birthday cake. I knew I had to come up with something different and carved his cake out of a watermelon instead. He ate a great big juicy slice and loved every last bite of it.
Watermelon carved cake
The first “cake” went over so well, the following year I made this for his Mickey Mouse Train Party. (We had a joint party so the cake on the bottom was for his cake- loving little brother).
Watermelon Mickey Train
And that brings us to this year and my dilemma with sending in a healthy, child friendly snack for his birthday celebration at school. I wanted to make sure it was something he would eat and per the school guidelines it had to be healthy. Following my watermelon cake tradition I figured I could pretty easily make them into cupcakes!
Watermelon cupcakes with banana frosting and blueberry topper
Here is what you need:
1 Watermelon sliced into 1 inch slices
3-4 Bananas
A Circle shaped cookie cutter (be sure it is small enough to fit inside your cupcake liners)
Blueberries for topping
Decorative sprinkles
STEP 1: Cut watermelon into 1 inch slices.
STEP 2: Use cookie cutter to cut out each circle and place inside cupcake liners.
STEP 3: Cut two small slices of banana per watermelon slice. Mash them up a little to look more like frosting and place on top.
STEP 4: Top with blueberry as the “cherry topper” and add a generous amount of sprinkles.
The teachers raved about the “cupcakes” and the kids ate them all up! It is a super healthy and adorable summer birthday treat!
And now for the Giveaway! ONE lucky reader will win a FREE book from Barefoot Books!
This giveaway is only open for 24 HOURS! Click the link below and follow directions in the box! Don’t forget to share!
It was such a gorgeous day today, the girls and I spent most of it outside. We played with the water table, ran around flying kites, kicked a ball and even enjoyed our lunch outside. Then someone said, “Let’s make a craft.” I didn’t feel like making a huge mess with paint and no one was biting the line for crayons and coloring books. Quickly, I remembered I have this fun book I picked up from a retired teacher selling her 20 year collection of classroom books! I scored 2 big boxes of pristine kids books for $8.00!
There were a few different crafting books in the collection and I nearly forgot about this one. But, my girls pulled it out recently and asked to make a craft. I guess I couldn’t put it off any longer.
Original print date 1978
I love that it felt like I was opening a time capsule from the 1970’s when I opened this “How-to” book!
Easy to follow pictures in a book is easier for little ones to see and read.
You can certainly find instructions on how to make pinwheels on Pintrest. But I love that the instructions are in pictures and simply laid out in this book. It is a much easier way for little ones to follow without the annoyance of scrolling and dropping WiFi signals. Plus, there’s a lot less pressure for perfection. (For me).
Here are the materials you need:
Materials for pinwheels
Scrap book paper (double sided has a great effect).
Scissors
Wooden dowels (I used wooden skewers).
A pencil
Thumb tacks
A ruler
A 1-2 inch circle to trace
Snag your kids toys for projects
STEP 1: Measure an 8×8 square on paper. (I cheated and traced the instruction book to create my square page).
STEP 2: Cut out square.
STEP 3: Fold your square corner to corner and crease. Unfold and refold to opposite corners and crease.
STEP 4: Draw a circle in the center point. (I found this easier to do after I made the creases).
STEP 5: Cut along the fold lines and stop at the circle.
STEP 6: Lift every other corner of each triangle and pull to the center circle.
STEP 7: Push a thumb tack through the center of paper and then through the wooden dowel (or skewer).
Ta-da!
The pinwheels really turned out better than I expected (since I didn’t use any actual tools to measure).
We did this just for fun, but it would make a brilliant party decoration! I inserted the stems of the finished pinwheels into colorful drinking mason jars. I removed the straws and pushed in the skewers. The points on the skewers makes it easy to poke into potted plants around a deck, or push into the ground to line a walk way. You can even fill up buckets with fun treats with a pinwheel poking out. Or just make it a fun way to pass the time on a sunny day!
What’s your on-the-fly/go-to craft? Feel free to share pictures or comments below!
Disclaimer: Clearly in 1978 kids were allowed to play with thumb tacks. Most likely while sliding down a hot aluminum slide over top of loose gravel. If you make this craft, please be sure you take precautions for little ones who still like to explore by putting things in their mouth.